Firebase Analytics is a free, out-of-the-box analytics solution that inspires actionable insights based on app usage and user engagement.
Points to integrate Firebase Analytics in your project.
- Crate a project in android studio.
- Open build.gradle(project) and add a class path to it(
classpath 'com.google.gms:google-services:3.0.0'). After adding the class path it will be look like this-
// Top-level build file where you can add configuration options common to all sub-projects/modules.
buildscript {
    repositories {
        jcenter()
    }

    dependencies {
        classpath 'com.android.tools.build:gradle:2.2.0'

        //________class path for google service
        classpath 'com.google.gms:google-services:3.0.0'
        // NOTE: Do not place your application dependencies here; they belong
        // in the individual module build.gradle files
    }
}

allprojects {
    repositories {
        jcenter()
    }
}

task clean(type: Delete) {
    delete rootProject.buildDir
}
- Open build.gradle(app).
- Add a dependancy (
<project>/<app-module>/build.gradle)- - compile 'com.google.firebase:firebase-core:9.0.0'
- Add a plugin in the bottom of build.gradle(
<project>/<app-module>/build.gradle)- - apply plugin: 'com.google.gms.google-services' .
- After adding dependency and plugin your app level build.gradle will be look like this-
apply plugin: 'com.android.application'
android {

    compileSdkVersion 23
    buildToolsVersion "23.0.2"

    defaultConfig {
        applicationId "com.pankaj.firebaseanalytics"
        minSdkVersion 15
        targetSdkVersion 23
        versionCode 1
        versionName "1.0"
        testInstrumentationRunner "android.support.test.runner.AndroidJUnitRunner"
    }

    buildTypes {
        release {
            minifyEnabled false
            proguardFiles getDefaultProguardFile('proguard-android.txt'), 'proguard-rules.pro'
        }
    }
}

dependencies {
    compile fileTree(dir: 'libs', include: ['*.jar'])
    androidTestCompile('com.android.support.test.espresso:espresso-core:2.2.2', {
        exclude group: 'com.android.support', module: 'support-annotations'
    })
    compile 'com.android.support:appcompat-v7:23.2.1'
    testCompile 'junit:junit:4.12'

/*______________________for firebase analytics______________________*/
    compile 'com.google.firebase:firebase-core:9.0.0'

}

apply plugin: 'com.google.gms.google-services'
- Now your updated manifest.xml will be look like this-
<?xml version="1.0" encoding="utf-8"?> <manifest xmlns:android="http://schemas.android.com/apk/res/android" package="com.pankaj.firebaseanalytics"> <!--permissions--> <uses-permission android:name="android.permission.INTERNET" /> <application android:allowBackup="true" android:icon="@mipmap/ic_launcher" android:label="@string/app_name" android:supportsRtl="true" android:theme="@style/AppTheme"> <!--activities--> <activity android:name=".MainActivity"> <intent-filter> <action android:name="android.intent.action.MAIN" /> <category android:name="android.intent.category.LAUNCHER" /> </intent-filter> </activity> </application> </manifest> - Now go to the Firebase developer console and create a new project

- Enter your application name and select your country. then click on "create project"

- Now you will see a screen like this
-
then click on "add Firebase to your Android app".
- Now put
- Copy and paste the google-services.json file into the application root directory.

- Open main activity and put the following codes.
package com.pankaj.firebaseanalytics;
import android.os.Bundle;
import android.support.v7.app.AppCompatActivity;
import com.google.firebase.analytics.FirebaseAnalytics;

public class MainActivity extends AppCompatActivity {

    private FirebaseAnalytics mFirebaseAnalytics;
    private String APP_OPEN = "APP_OPEN";

    @Override
    protected void onCreate(Bundle savedInstanceState) {
        super.onCreate(savedInstanceState);
        setContentView(R.layout.activity_main);
        initializeAnalitics();
    }

    /*_________________________ Initialize Analytics ___________________________*/
    private void initializeAnalitics() {
        mFirebaseAnalytics = FirebaseAnalytics.getInstance(this);
        addEventsToAnalitics(APP_OPEN, APP_OPEN);
    }

     /*_________________________ Send Event ___________________________*/
    public void addEventsToAnalitics(String event, String message) {
        Bundle params = new Bundle();
        params.putString("message", message);
        mFirebaseAnalytics.logEvent(event, params);
    }
}
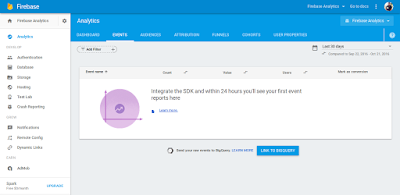
- Now firebase analytics have integrated in application. Run this app and go to the firebase console to check analytics data, then we will see the window like-
-
- Analytics data will be show within 24 hours. After 24 hours above window shows data like this-
-
- Good bye, Thanks to read this blog.


No comments:
Post a Comment